
Build and Kill Zombies Supports Rolls Guide
Passives and helpers. They do not replace a plow. Roll only after the kart can finish a Drive.
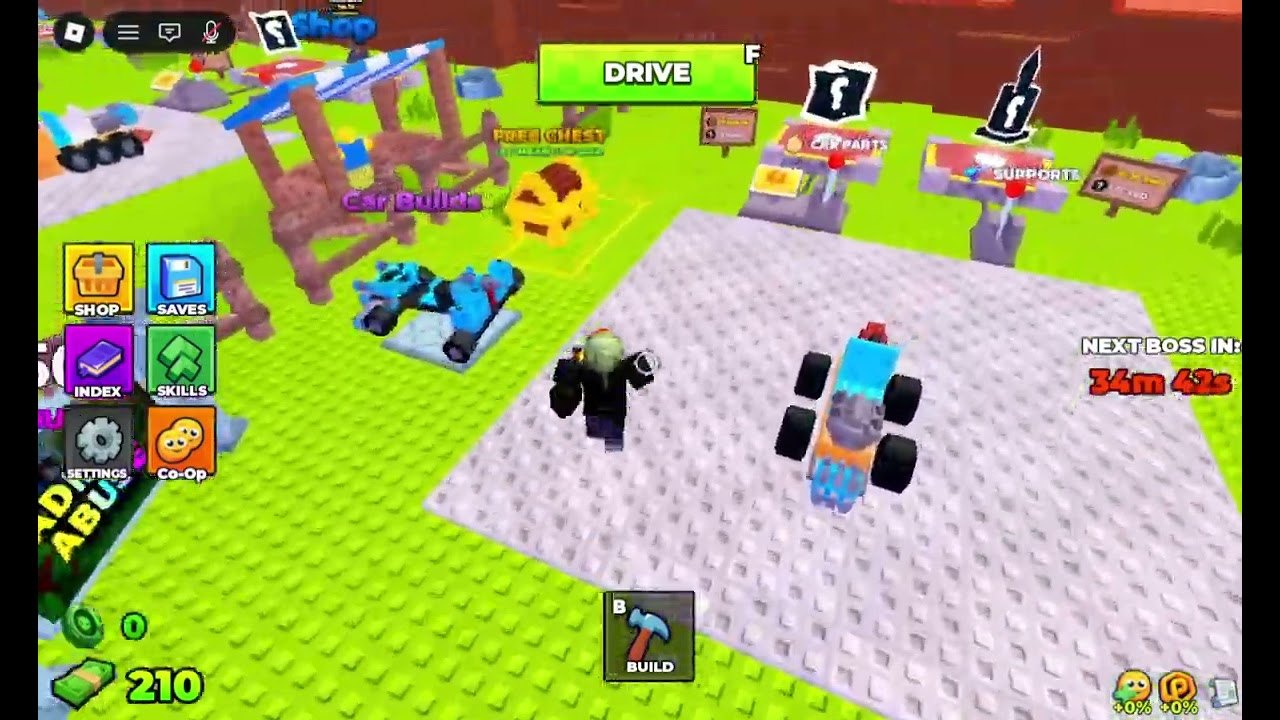
The Support stand sits on the lobby grass near Car Parts. Script farms list AUTO ROLL SUPPORTS. Treat Supports as passives and helpers, not as a second nose. Rolling them on a starter buggy is how wallets vanish.
What Supports are not
- Not Car Parts (chassis).
- Not Skills (the green tile).
- Not Index (catalog).
- Not turbo itself (turbo is a part; a Support may buff speed).
- Not a co-op share. Each account rolls its own.
Until tooltips stabilize, we rank timing, not made-up names. If a patch prints a Support name on the HUD, it will be copied here exactly.
When to roll
After:
- A real nose from car parts.
- Wheels or turbo so studs/s leaves 10.
- One matching Skills node.
- A Save you can reload.
Before a boss clock under ten minutes, stop. Before Admin Abuse, stop. After a 92% brick, repair first.
Cash math
A short Drive loop that nets a few hundred bills is “free.” A Support roll that costs more than that loop should wait. Codes and the group chest should hit the nose, not this stand. AUTO ROLL will ignore that order.
Co-op
Five trees, five roll tables. Specialize. Do not all dump into the same Support because a friend got a lucky buff. Mixed builds plus mixed Supports is how King 1x1x1x1 gets beaten at all.
If a roll feels strong then fails
The chassis was cardboard. A contact buff on an unarmored seat still pops. Put the next bills into HP, then roll again. The build planner lists Supports as step 4 on purpose.
Live patches (last universe update 12 September 2026) can retune roll rates without a Trello. If a GUI still auto-rolls after a patch, assume it is stale. Manual clicks on the stand are the wiki default.
A Support session that does not empty the wallet
Finish a short Distance loop. Confirm bills went up, not coins. Confirm the nose still shows 100% on the front brick. Open Support. If the cost of one roll is more than the last loop earned, walk away and farm again — see how to farm cash. If you can afford it, roll once. Drive. If the kart feels the same, you bought a cosmetic passive; put the next bills into wheels or HP at car parts. If the kart feels faster or tankier, snapshot that Save and stop rolling until the next cash dump. Co-op partners should not copy your roll blindly; their Save may be a bumper while yours is a roller. During King 1x1x1x1 prep, freeze the stand entirely. After the fight, repair, then consider one more roll. That discipline is the difference between a Support that helps and a Support that is a screenshot of an empty bill counter. The build planner exists so you do not have to remember the order under a red timer.
Index will show pretty icons. Ignore them until the bumper or roller survives a full loop. Supports that look rare and do nothing on a cracked seat are still a loss. Farm, armor, then roll. That sentence is the page.
Frequently Asked Questions
Quick answers for lobby, Drive, codes, and boss timers.
Should new players roll Supports first?
No. Buy a nose from Car Parts, then Skills, then Supports.
Do Supports replace a plow?
No. They are passives. Walkers still delete seats without front armor.
Can I share a Support with co-op?
No. Rolls are per account, like Skills and Saves.
Should I roll during a red boss timer?
No. Freeze the Support stand, load the boss Save, and Drive. Roll after you repair.